
Live Streaming
Use the Video Screen smart item together with the Scene Admin smart item to stream live video into your scene.
Requirements #
- A scene with at least one Video Screen smart item.
- The Scene Admin smart item linked to your video screens.
- Streaming software that can output to an RTMP endpoint (e.g. OBS , XSplit , StreamYard ).
Configure the scene #
-
Add a Video Screen smart item to your scene.

-
Add a Scene Admin smart item and enable the Video Screens section. Select each screen from the dropdown and give it a friendly name for the admin UI.
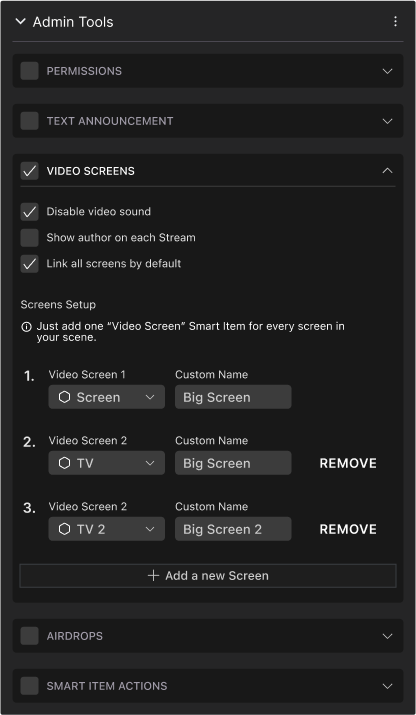
-
Publish your scene (World or Genesis City) and enter as a user with admin permissions.

Get stream credentials #
-
Open the Admin UI in the scene (top‑right icon).

-
In the Video tab, switch to Live and click Get Stream Key.

-
Copy the RTMP Server and Stream Key into your streaming software.

❗Warning: Only one person can stream to a scene at a time. When finished streaming, click Stop Streaming in your software to free the channel.
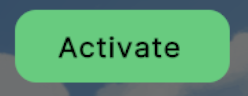
Start and control the stream #
-
Start streaming from your software.
-
In the Admin UI, click Activate to show the stream in the scene.
Notes:
- Streaming works in Worlds and Genesis City, with no audience limits on the scene side.
- If you add multiple Video Screens, mute all but one to avoid audio artifacts.
Stream keys #
Stream keys are generated per scene and are valid for 4 days (96 hours). A single live session can run up to 4 hours continuously.

- Click Reset Stream Key to revoke the current key and issue a new one. Ongoing streams will stop.
- Each scene has its own streaming address and key. Admins can share the key with external streamers.
- Only one stream can be active per scene at a time; starting a new one will overwrite the current stream.
❗Warning: Treat stream keys as secrets. Reset the key between presenters if needed.
Streaming from other providers #
You can also stream using third‑party infrastructure by configuring the Video Screen to Video URL and pasting a stream URL.
- The URL must be
httpsand CORS‑enabled by the provider (YouTube and similar sites won’t allow direct playback). See About External Streaming . - Managed providers include Vimeo , Livepeer Studio and Serraform .
- Tips for encoder setup: Setting up OBS for successful streaming .